Connect to VirtuCrypt Access Points (VAPs) through AWS
Security groups in AWS
Instructions for creating and configuring AWS security groups for VAP access.
In AWS, a security group acts as a virtual firewall for your EC2 instances to control incoming and outgoing traffic. As VirtuCrypt processes secure information, we recommend creating a new security group to assign to the VAP. To create a new security group, perform the following steps:
1
Go to the Network & Security section in the left-side menu of the AWS Console and select Security Groups.
2
Select [ Create security group ].
3
Fill in the requested fields. The drop-down list for VPC displays your organization’s internal VPCs. The VPC you select connects to the VAP.
4
Add an Inbound rule to the security group by selecting [ Add rule ].Security groups allow you to enforce rules with a high degree of granularity.Proceed with one of the following options, depending on your organization’s security requirements.
Option A: Referencing the following example, create an inbound rule:
Select All traffic from the type drop-down list.
The protocol and port range default to All.
The custom IP is VPC subnets for your organization (we recommend a minimum of three), as created earlier in the guide.
Create a Security Group - Option A
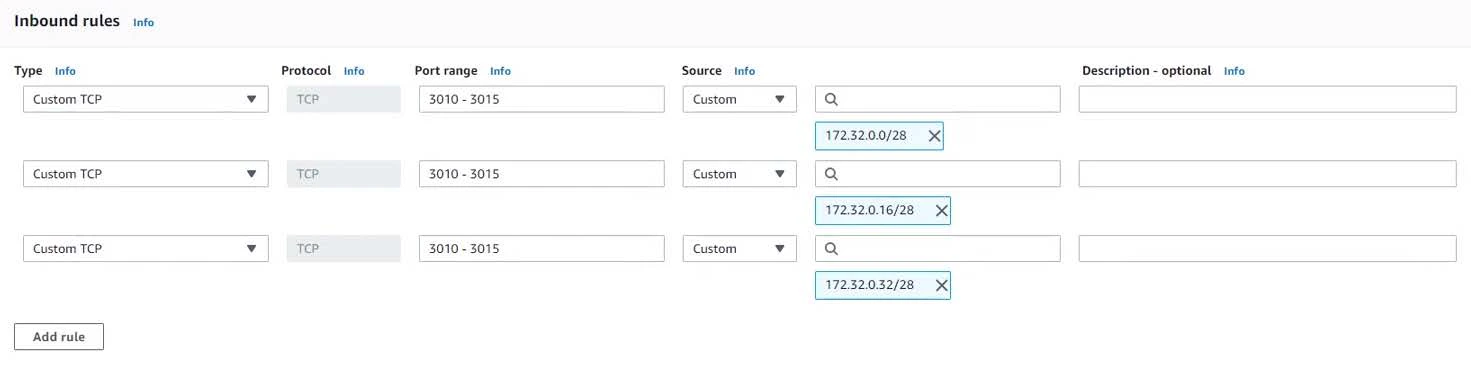
Option B: This choice is more granular, and therefore, more secure, because it also includes custom port ranges that Futurex provides. Referencing the following example, create an inbound rule.
Select Custom TCP from the Type drop-down list.
The protocol defaults to TCP.
Futurex creates the port range, and your Futurex representative share it in an email.
The custom IP address is one of the VPC subnets for your organization, created earlier in the guide. The difference from Option A is that you must create separate rules for each subnet instead of including all thrree subnets in one rule.
Creating a Security Group - Option B
5
The Outbound rules l default to allow all traffic. You can customize or adjust the outbound rule per your organizational policies.
6
(Optional) Add tags to the security group.
7
Select**[ Create security group ]**.
8
Return to the VPC service and go to the Endpoints menu.
9
Select your newly created endpoint so that it is highlighted in blue. Go to the Security Groups tab, and select [ Edit Security Groups ].
10
You can add to or replace the security group associated with the endpoint from the search bar.
You can associate multiple security groups with a single endpoint.
After you finish making changes to the security group(s), select [ Save ].
Was this page helpful?
⌘I
Assistant
Responses are generated using AI and may contain mistakes.